TOC
Finding and 3D Printing a Hand
TLDR;
This is a long post as it’s the back story to the whole project and how it came about to getting a design for the hand, it covers the 3D design and printing as well as the problems along the way. Don’t worry if your here hoping to see code and electronics or even the Xamarin App thats coming soon, I just need to explain where the Handy design came from first. Plus I have noticed that giving talks around the world most people find the 3D printing side very interesting.
Last Time Out
So last time out it was about the big picture behind this project and that I really want to be able to not only provide Kayden with a working arm but along the way come up with a workable design and processes that can be used by others. This means that the design needs to be fairly simple and cheap to build but as always we still want the best we can get.
So now I had decided that I was going to help (Well kind of fooled into lending a hand!) I got really into the idea of what could be done and started my searches of the Wonderful Wide Web looking for the design used by that dad that was in the media.
Search the web as always turns up many things but starting with what the NHS can offer was my first port of call just to see if there was something that could be copied. Finding a website for the Limbless Association I thought I had hit the right place they will have all the links but, and bearing in mind I was doing this 2016 so some years ago take a look at this site
http://www.limbless-association.org/index.php/directory/links
You will notice (I just checked again) that the site is under construction still and has been for years, so it’s either some really complex amazing design or it’s been forgotten about after funding dried up. Either way it’s not ideal, so more searching found the Team Unlimbited website
http://enablingthefuture.org/team-unlimbited-arm/
This was the design that was printed by the Dad in the media, so looking around at these designs I found one that would work and connect to Kaydens existing arm, this means that the Hospital supplied arm would still be used but in the place of the Hook there would be a Hand. This hand would use the same mechanism as that Hook but be hand shaped and 3D printed. SHowing this design the Kayden and his family they didn’t really see any benefit over the existing hook and thought being plastic it would just break quicker, but we thought for the price of a few meters of filament it was worth printing one out.
Fire up the 3D Printer
Now back then my printer was an original RepRap Mendle which is the brain child of Professor Adrian Bower, the RepRap printers are designed such that they can print majority of their own parts. This means that you build a printer using parts printed on another printer and the first thing you set about printing is spares for yourself and extra to sell to the next person along the chain. The design is very impressive and means the printers are very cheap but the simple early design made affected the print quality, think Dot Matrix era and your not far off.
We got a hand printed and assembled and with some post printing finishing using sand paper and acetone it wasn’t that bad but that work too quite a while and wasn’t ideal. But we had a prototype and using some heavy duty fishing wire we connected it to Kaydens arm and got him to try it out, it was clear within a few minutes he hated it. The problem was that the hand did the same as the hook but with less control and dexterity so it was back to the drawing board.
Open Hand Project
More searching I came across a design by Joel Gibbard from the Open Hand Project (http://www.openhandproject.org/) this was a motorized unit with some basic control and the start of something. Following the design it turned out it was OpenSource as well (Hence Open I guess!!) and the community was active, so I dived in and started to play with things. Now that I was trying to print smaller and more complex parts I was reaching the limit of what my now wobbly old printer could manage… Yes I could do the same post print sanding etc but as mentioned before I want this project to be repeatable with very little effort so I needed a new idea.
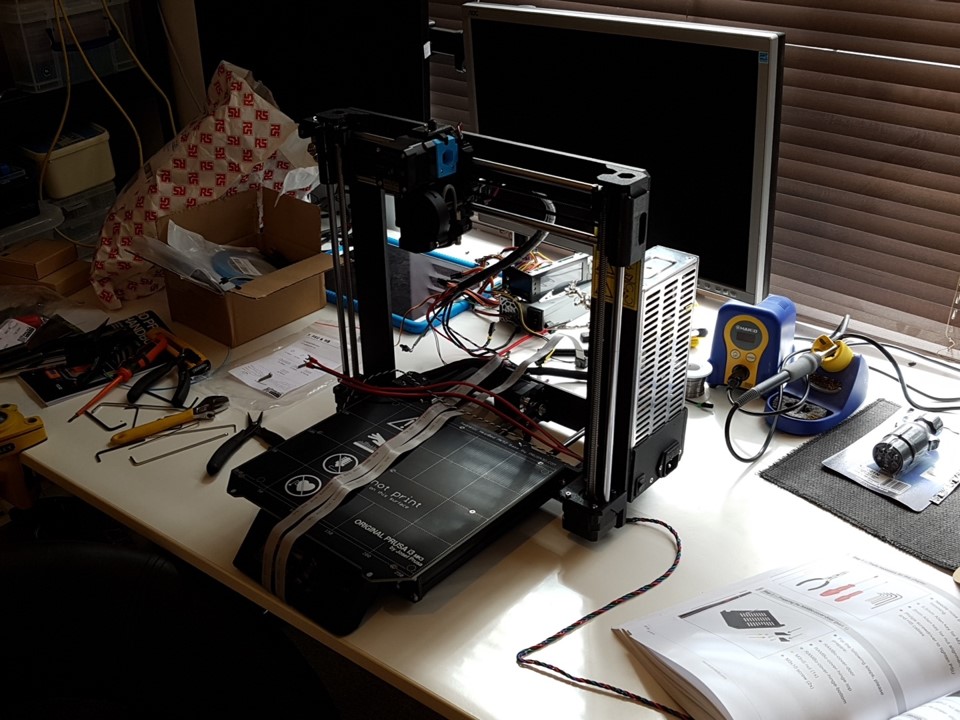
Prusa Printer
So what do you do when the tech dosn’t cut it anymore… you upgrade of course, and I had been searching for an excuse to upgrade for a while and this was one I could get past management (AKA the Wife) as it was for a good cause. So I ordered my Prusa Mk3 and started building, this printer and it’s predecessor was winning awards for it’s abilities and priced at just £800 for the kit it was ideal. The printers are now even cheaper at around £700 and take about a day to build with basic DIY skills. https://shop.prusa3d.com/en/3d-printers/180-original-prusa-i3-mk3-kit.html
Side note if you have never used a 3D Printer before or your considering buy a replacement like I have then I can not recommend Prusa printers highly enough, not only is the price reasonable but they are such capable printers and work perfect out of the box. Trust me you won’t regret it…
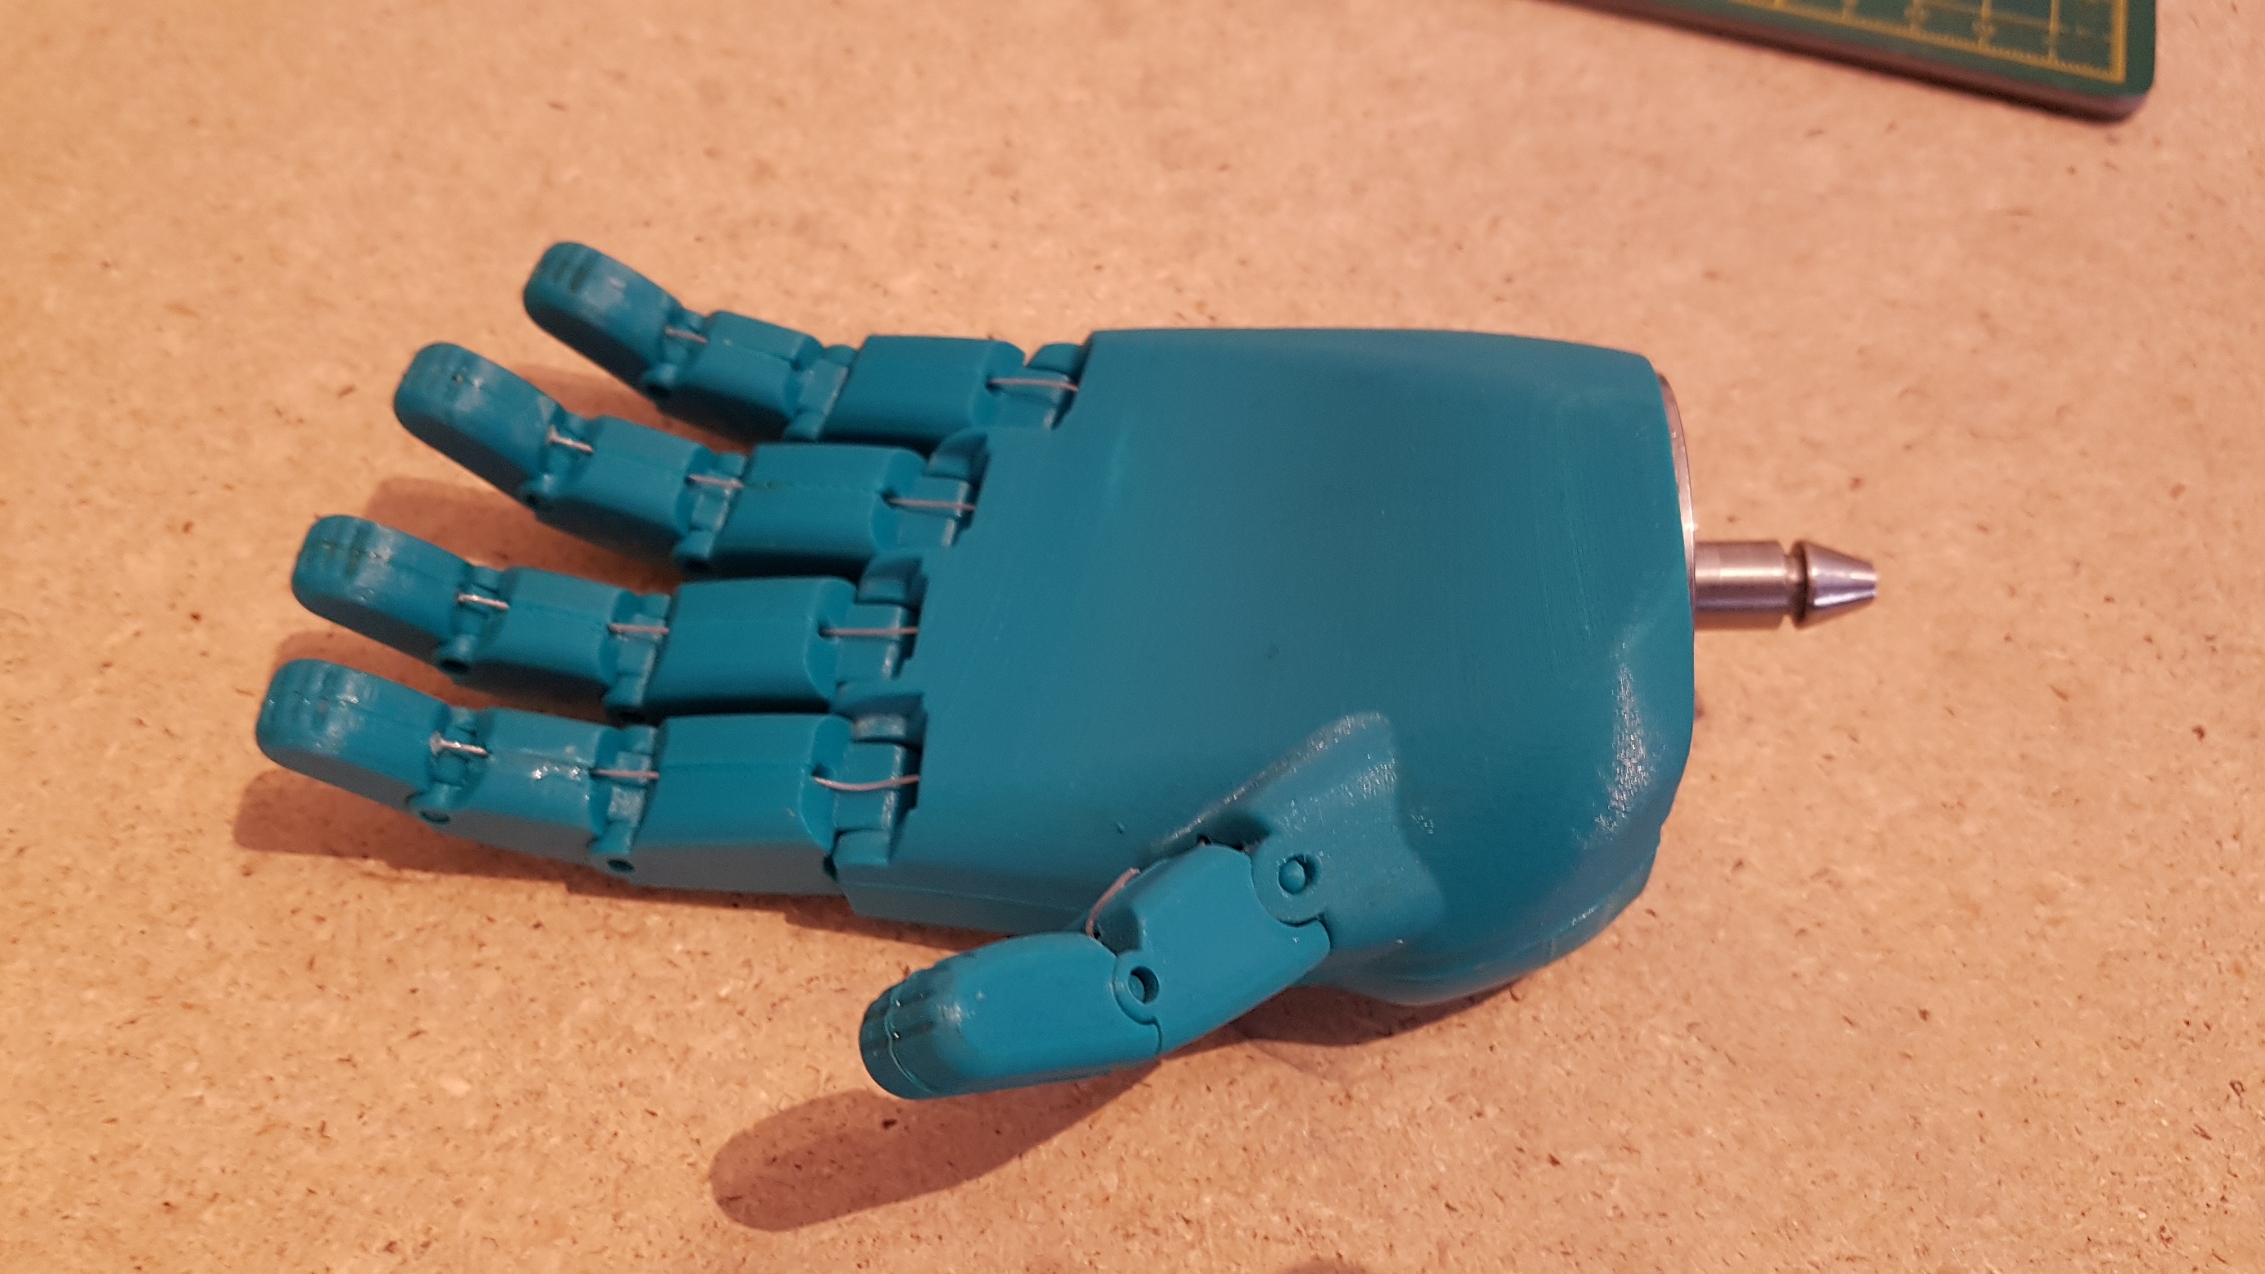
While I wait a few months for my printer to arrive from Poland (It was the new design I was waiting for…) I was watching the project and noticed that it had moved on to become OpenBionics (http://www.OpenBionics.co.uk) and the designs had moved along to produce initially the Ada Hand and then the Brunel. The Brunel hand looked perfect it was controlled with 4 motors had some Arduino controller inside and the codebase like the 3D design was all open source on GitHub to play with.
Building Brunel
Printer now build I set about printing the first of many Brunel Hands and obtaining all the parts listed in the BOM (Bill Of Materials)
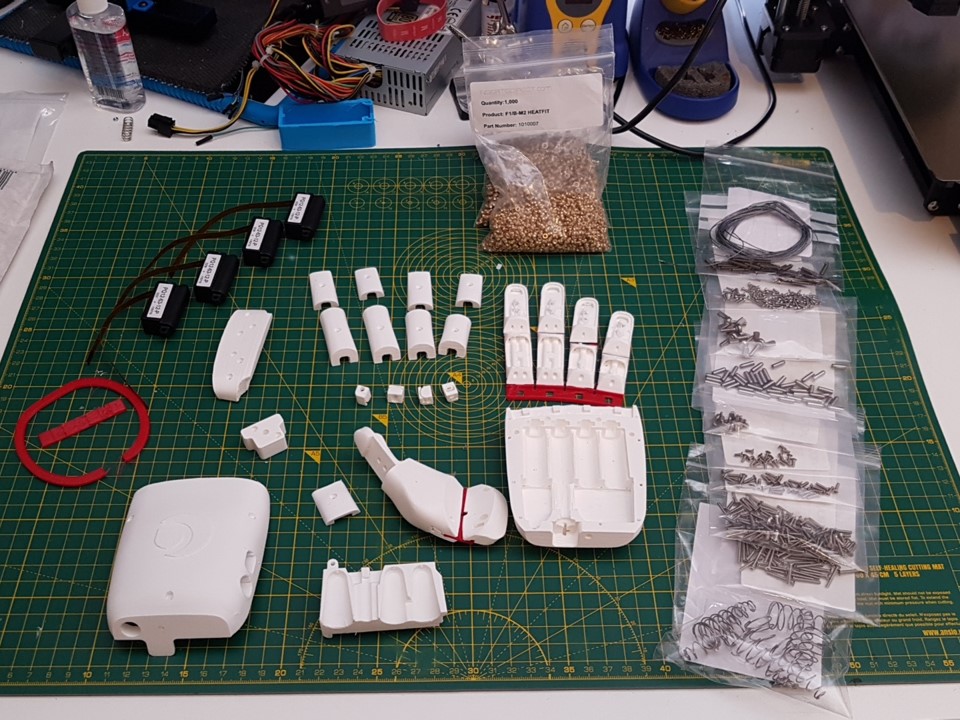
So all the mechanical parts were printed and as you can see in the image there are two colours printed, the White plastic is hard like Lego and is printed from a material called PLA this is produced from vegetable extract. The Red parts are printed in a flexible material as they act as the Ligament to hold the hand together, being flexible these are a little harder to print but the Prusa printer nailed it first time something that would have taken many attempts on my old printer.
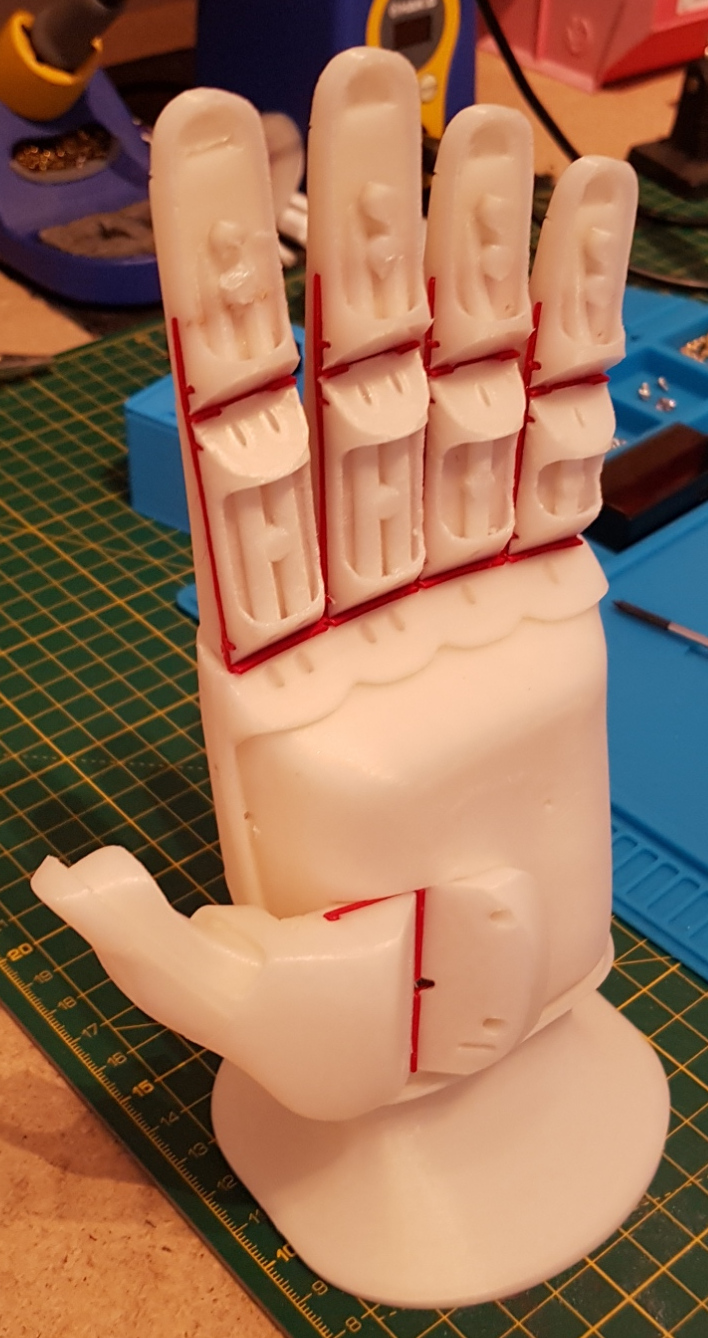
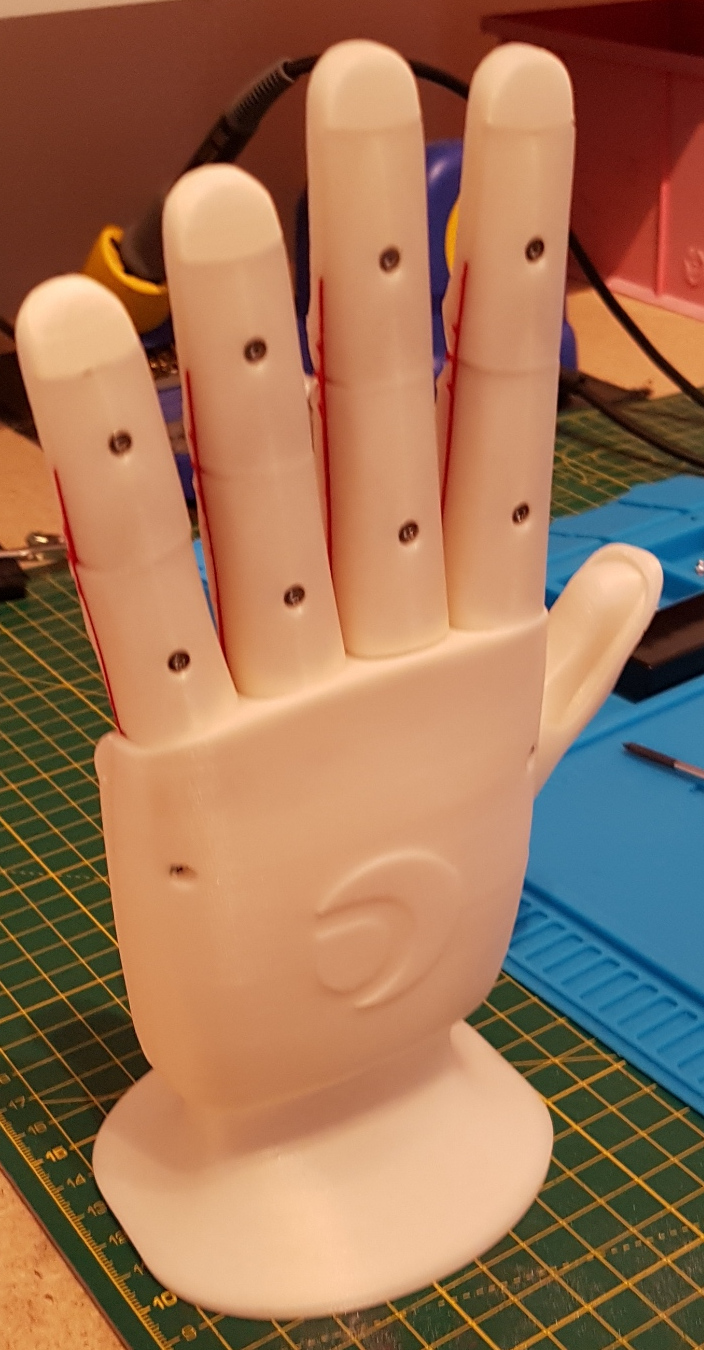
Finished Mechanical Build
Now the eagle eyed amoung you will look at the image above and notice that the finger pads on the Distal’s, that’s the last finger bone where the finger nail lives, and the fleshy bit on the Proximal the middle of the finger are a bit weird. The reason these are not fully printed is that the Hard PLA plastic would make gripping things difficult as it’s like lego so smooth and slippy, the way the OpenBionics team get around this is to mould onto the Distal and Proximal’s as well as the Palm of the hand a Urethane material that is kind of soft and squishy rubber a bit like the band that holds your swimming googles on your head.
This needed some moulds to be printed but as I was just getting the hand working and controlling it I left this on my Beta version until much later, the Urethane material costs about £50 and has a shelf life of only a few weeks once opened, so I wanted to be able to mould a few hands at a time to reduce the cost per hand.
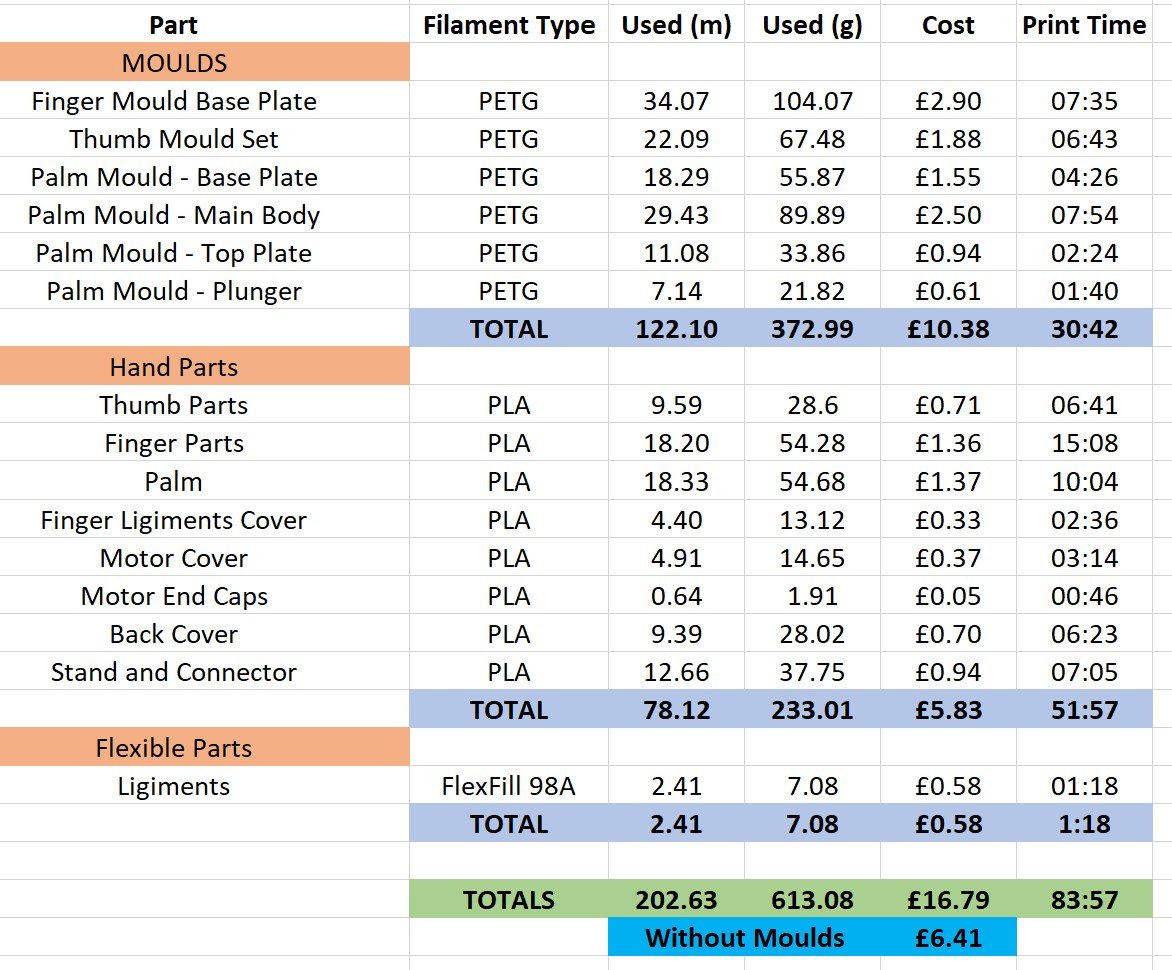
Costs so far
Discounting the need to upgrade the printer which was £800 the costs of material so far for the Plastic parts is impressivly low, 3D printing material is purchased in spools typically 1Kg in weight and the PLA spool is more than enough to print the parts for 3 Hands. The Moulds need for the Utherane is printed in PETG which is a stronger material and ideal for larger prints and as mentioned the felxible parts from FlexFill 98A. Breaking the costs out for the parts here you can see that other than a bit of electricity for the long print times the costs are impressive and the weight of the parts very light for a child to hold.
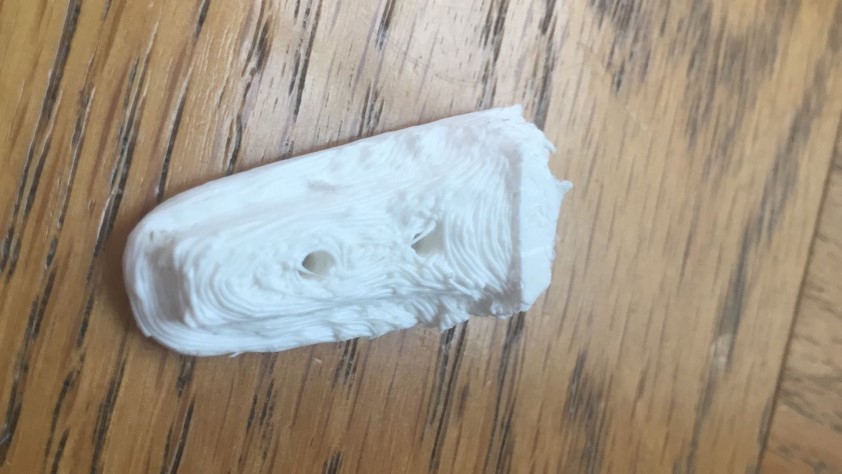
The Moulds shown here once printed can be re-used many times so only need printing the once if they are looked after, again reducing costs.
Next: Electronics for Control
Lets get things moving.